Wilted Greens Soup

Summer isn’t really hot soup season but it is cold soup season – gazpacho any one?

My intent was to make this soup tasty chilled or warm, but it was my first go at this style and I preferred it warm. Not such a bad thing, as it turns out, because while summer is certainly hot outside, it is all too often FREEZING inside thanks to the A/C.

Inspired by this recipe, I put my sad, somewhat soggy, Spring Mix to good use. Upon further inspection, I found several other veggies who had seen better days. Throwing caution to the wind, everything on it’s last leg was added to the soup.

Being dairy free has expanded my culinary skills and creativity. How to make a soup rich and creamy without cheese or milk? Cashews, of course. And in this case, cashews and a few Brazil nuts. Cashew cream (soaked then pureed cashews) are often used to replace cheese and cream in vegan recipes. I’ve used it in several dishes and love the rich, creamy nuttiness it adds. I’m beginning to experiment with other nuts to see how they compare.

An emulsion blender or high-speed blender is required for this recipe. I made the soup super creamy, but if you prefer more texture you can always blend half and leave the other portion unblended.


The type of greens and veggies you use will affect the color of your soup. My spring mix was full of dark greens and deep purples, that in combination with the other vegetables gave my soup a rather unappealing brownish color. However, once the cashew cream was added, it became a light mossy color. Perhaps not the prettiest, but it was flavorful and kept me from throwing away food. Win, win in my book.

{Wilted Greens Soup}

[Ingredients]

  • ~2 cups wilted greens
  • 2-3 carrots
  • 1 summer squash
  • 1 fire roasted red pepper or bell pepper
  • 1/3 cup cashews + 2-3 Brazil nuts
  • 2-3 stalks celery
  • 2 cloves garlic
  • 1/4 red onion
  • 1 can chickpeas, undrained
  • 1 carton vegetable stock
  • 1 TBSP fresh basil
  • Salt & pepper to taste
  • ~1/2 TBSP herbes de provence
  • 1-2 TBSP olive oil
  • 2 TBSP tahini

[Directions]

  1. Add cashews + brazil nuts to a deep bowl. Cover with water, soak for at least one hour.
  2. Rinse and coarsely chop veggies.
  3. Add olive oil to pan, heat over a medium flame then saute onion until tender and translucent.
  4. Add summer squash, bell pepper, and carrots. Salt & pepper to taste. Cook for 5-10 minutes.
  5. Add greens, chickpeas along with the fluid from the can, garlic, and stock.
  6. Stir in basil and herbes de provence. Cover and allow to simmer for 30-45 minutes.
  7. Once nuts have soaked for at least an hour, drain most of the water from the dish then add the nuts and remaining water along with the tahini to a food processor. Blend until smooth.
  8. Using an emulsion blender or regular blender, blend soup until smooth. Add cashew cream and stir until well incorporated.

Note: my husband added a dash of Sriracha to his to give it some spice.

Cheers,

Danielle

Fish Tacos

My last trip to Costco I opted to buy Mahi Mahi instead of Salmon. We had been eating so much Salmon and the Mahi was a bit less expensive so I went for it.

If you’ve never tried Mahi Mahi it is a mild white fish. I would say that it holds up better when cooking than Salmon does. Meaning it is more firm with a “meaty” consistency.  Even when slightly overcooked, Mahi doesn’t seem to develop a strong fishy taste.

Shortly after our Mahi purchase, Dan and I went out for dinner and Dan ordered Mahi. I was surprised when the bill came to find out his dish was $19! That’s the price of a whole package of Mahi at Costco! Just goes to show, eating at home will save you money and calories!

The next time you get the hankering for fish tacos or Mahi, give this recipe a whirl…

{Mahi Mahi Fish Tacos}

[Ingredients]

Serves 6

  • 4 Filets Mahi Mahi
  • 1 1/2 TBSP Taco Seasoning (I used Pampered Chef Fiesta Seasoning)
  • Chili powder and Paprika, to taste
  • 1/2 cup Pineapple juice
  • 1/2 cup Salsa
  • 1/2 red onion
  • 1 clove garlic
  • 1 TBSP EVOO

[Directions]

  1. Heat EVOO in a cast iron skillet or in a heavy bottom pan over medium heat. Add onion and sauté until tender. Once onion is tender, add garlic.
  2. Place Mahi in pan and season generously with taco seasoning spices. Cook for 3 minutes then flip.
  3. Add pineapple juice and salsa to pan and continue to cook until fish flakes and is opaque.
  4. Reduce heat to low, flake fish and add salsa. Simmer for 5 to 10 minutes.

{Zesty Brussels Slaw}

[Ingredients]

  • 8 oz. Brussels sprouts
  • 1 fire roasted yellow pepper
  • 1/2 cup mango, diced
  • 2-3 sprigs cilantro
  • 1/4 cup pineapple juice
  • 1/4 cup match stick radishes
  • Dash of cayenne pepper
  • Pinch of salt

[Directions]

  1. Remove stems from sprouts then halve. Add to food processor and pulse until finely chopped. Add to a medium bowl.
  2. Dice yellow pepper. Dice mango. Add to bowl.
  3. Mix pineapple juice, radishes, and cilantro into brussels.
  4. Season with cayenne and salt.


Serve with rice, tortillas, avocado slices, and black beans.

Cheers,

Danielle


Summer Garden Salad

Basic doesn’t mean tasteless. Sometimes keeping things simple, combining a few fresh ingredients makes the best dishes.

This salad is perfect for backyard gardeners as all but one ingredient can be found in most gardens. A pluck, wash, chop and eat salad that can be thrown together in a few minutes, this may be a new favorite.

{Summer Garden Salad}

[Ingredients]

  • 1 cucumber
  • 3-4 Tomatoes
  • Basil leaves, chopped
  • 1 fire roasted yellow pepper (You can do this at home, just follow this recipe)
  • 1 clove garlic

[Directions]

  1. Slice cucumber and tomato; place in bowl.
  2. Coarsely chop basil leaves. Finely dice garlic. Add to bowl.
  3. Chop roasted yellow pepper. Add to bowl and mix well.
  4. Chill for at least 30 minutes before serving for best flavor.

Cheers,

Danielle

Summer Party Survival

The season of cook-outs, picnics, and summer parties is upon us! And while these gatherings are sure to be filled with fun, they can also do a doozy on that “summer bod” you’ve been working for.

Fear not, with a little planning, you can have your cake and eat it, too. In this post, I’ll share some ways to avoid over indulging .

The first rule: Wait 30 minutes after eating before swimming. Just kidding, swim before, during, and after your meal if you wish. Swimming is a great total body workout and it’s easy on your joints. 🙂

We’ve heard it all before but it is worth repeating, showing up to a summer gathering HANGRY is a recipe for disaster. Let’s be honest, when it feels like our body is eating itself, we reach for the closest edible item without really thinking about what it is. Before you know it, you’ve singlehandedly abolished the chips and salsa before the burgers even hit the grill.  Ensuring you’ve had a meal or snack prior to arriving to your summer shindig will help you make better decisions there.

Scope out the landscape and decide what will get real estate on your plate before bellying up to the food table.  If this feels like too much work or there are just some things you know you can’t say no to, watch your portions. Grab the smaller plate, if you have the option to. Alternatively, start with the greens then work your way to other dishes and limit yourself to one plate.

Hydrate, hydrate, hydrate – with water. Jazz up your H2O with slices of citrus fruit and herbs. Dehydration can make us feel hungry when what your body is actually craving is hydration.

On the topic of liquids, opt for lighter summer libations. Think of alcohol as dessert and, of course, drink responsibly. My go to is cucumber vodka with soda water and a slice of lime. Super refreshing, simple, and free of additional calories from mixers. Drink a glass of water between cocktails to ensure adequate hydration.

Save a few calories by having an “open face” style burger or use a lettuce wrap. Be mindful on how many condiments you add to your burger as those calories can quickly add up.

Perhaps the most simple, yet the hardest trick, walking away from the food area once you’ve had your plate. When the food is right there in front of you, we’re all more likely to graze. Walking away can save you from the “oh I’ll just have a little nibble of this” mentality.

Last but not least, consider bringing along a healthier dish to pass. You can rest assured knowing that you have another option in addition to the veggie platter.

7995f1b9067683f337dd8938da2ba16b

ICEE reinvented

In true Michigan fashion, the last month of summer is always the nicest. The weather we have waited months for is finally here then gone before we know it.

I’m not one to load up on all that sugar so I decided to whip out my Ninja and try to create something sans sugar.

I recently bought Stur, like Mio but made with natural ingredients, and thought the Coconut Lime would make a simple, refreshing ICEE. Which it absolutely did. The recipe is below and is super simple.

{Stur ICEE}

[Ingredients]

  • 1/2 cup ice
  • 3/4 cup water
  • 2 squirts of Stur, any flavor
  • 2-3 frozen strawberries

[Directions]

  1. Add all ingredients to Ninja and blend until ICEE consistency.

Cheers,

Danille

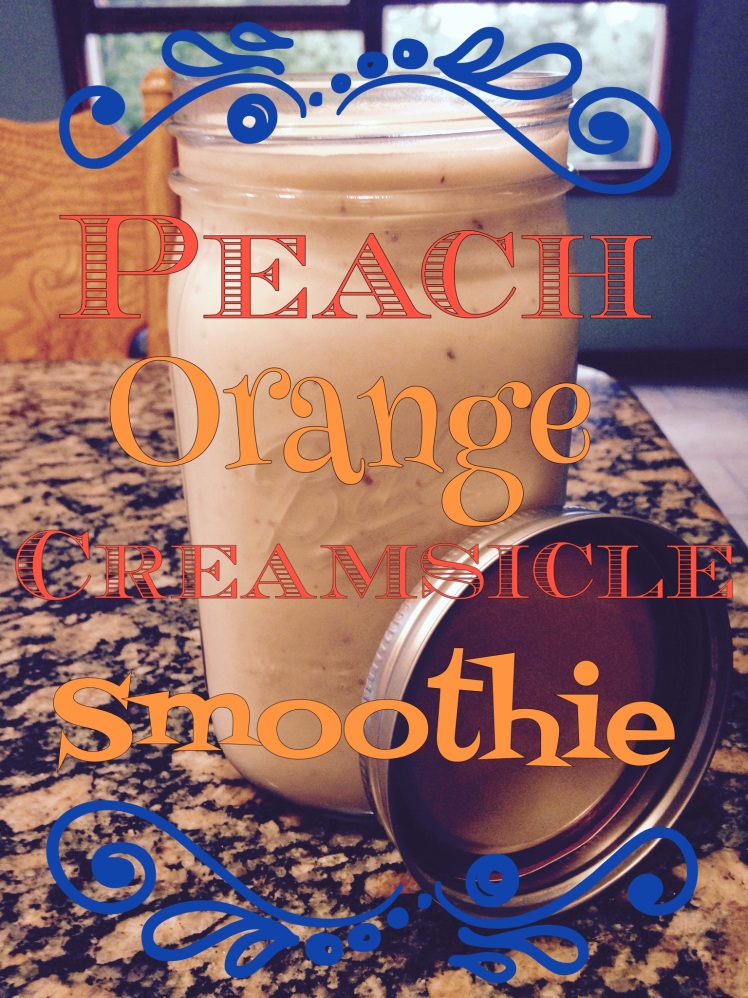
Peach Orange Creamsicle Smoothie

I slept in for the second morning today. And while it’s glorious to have the extra time to snuggle down under the cozy covers, I got out of bed this morning half wishing I had woken up in time to get a run in. I do enjoy the sleepy mornings around my house, silently moving through the house as Daniel still snoozes and our cat tries his best to be in my way as much as possible. I like that I get to remind Daniel after the 6th time his alarm goes off that it really is morning and he really does need to get ready for work. But most of all, I like that I get to make breakfast for Dan.

Most mornings I try to be out the door by 5:30 then shower and get ready for work at the gym. Since no one like soggy cereal or cold eggs, Dan has to fend for himself for breakfast. Meaning he grabs a handful of granola bars and a cup of coffee before heading out the door. And because he doesn’t like to take lunch with him, he often ends up eating a few more granola bars or a smoothie from somewhere on the road for lunch.  This makes the nutritionist in me cringe. So many simple sugars and refined bars, so little greens.

I left this morning happy knowing Daniel would be sipping on a cool smoothie filled with protein and fresh fruit. This smoothie gets incredibly fluffy from the Whey Protein Powder.  I have been using more superfood proteins so I forgot how much volume the whey add. This recipe will make about a 40 ounce smoothie! Like always, you can pour however much your hungry for then save the rest either in the fridge or pour into popsicle molds then pop in the freezer.

{Peach Orange Creamsicle Smoothie}

[Ingredients]

  • 1 cup Organice Orange Juice
  • 1 scoop Vanilla Designer Whey protein powder
  • 1 peach
  • 1 red banana
  • 1- 1 1/2 cups ice

[Directions]

  1. Add OJ, whey powder, ice, and diced peaches to your blending system and blend on the highest setting until smooth.
  2. Add banana and again blend until smooth.
  3. Pour a big glass for you and a friend, enjoy!

Cheers,

Danielle

Getting Saucey

I’ve finally sat down with enough time and mental energy to form a coherent post.  My last post was June 15th, can you believe that?! Life has been on fast forward this summer.  Once the weather grants us beautiful days, I can’t seem to help but fill them as full of activities as I can.  The hustle and bustle of being out and about is great but doesn’t leave me with much time to sit down to write.  After reviewing the growing list of recipes I want to share with you all, I knew I couldn’t wait any longer. You have empty plates to fill, after all, and I have the recipes to fill them! 🙂

So, my goal this week is to cross off every recipe on my list. Which will probably equate to a couple posts a day. Stay tuned, like, and comment to keep me motivated!

I love to know who is reading and sharing my posts, so pretty please, comment and let me know how your dish turned out or if you have any questions.

Now, let’s get down to business. I have two sauce recipes to share with you today. Both come from Argentina and pair wonderfully with grilled proteins.

{Chimichurri Rojo}

(Original recipe from Epicurious.com)

*Disclaimer: this sauce is very spicy! I did not use all the spice the recipe called for and still had to mix in sour cream to tone down the heat. Proceed with caution and use a light hand when adding spices.*

[Ingredients]

  • 4 TBSP Extra virgin Olive oil
  • 1/2 cup Red Wine Vinegar
  • 1 1/2 TBSP Paprika
  • 1 TBSP Cayenne
  • 4 cloves garlic, minced
  • 1 tsp freshly ground black pepper
  • 1 tsp ground cumin
  • 1/2 tsp kosher salt
  • 1 fire roasted bell pepper

[Directions]

  1. In a food processor, pulse together garlic, bell pepper, and olive oil until pureed and smooth.
  2. Pour into a medium bowl. Add remaining ingredients and whisk together.
  3. Refrigerate about 15-30 minutes before using to allow flavors to develop.
  4. Use as a marinade or sauce to top meat, fish, or pasta.

{Chimichurri Verde}

(Original recipe found on foodandnutrition.org)

[Ingredients]

  • 1 loosely packed cup fresh basil leaves
  • 1 loosely packed cup fresh parsley leaves
  • 1/2 loosely packed cup cilantro leaves
  • 1/2 loosely packed cup oregano leaves
  • 1/3 cup extra-virgin olive oil
  • 1/4 cup chopped onion
  • 2 cloves garlic
  • 1/4 cup red wine vinegar
  • 1/2 tsp ground cumin
  • 1/2 tsp salt

[Directions]

  1. Add all ingredients to a food processor and pulse until herbs are finely diced.
  2. Serve over grilled meat.

Bonus Round! I used the Chimichurri Rojo as the dressing for a pasta salad. Scroll down to find that recipe.

{Chimichurri Rojo Pasta Salad}

[Ingredients]

  • 1/2 – 3/4 cup Chimichurri Rojo sauce
  • 1/2 cup – 1 cup plain greek yogurt or sour cream
  • 1 package noodles, cooked
  • 1 large zucchini
  • 1 large summer squash
  • 1 cucumber
  • 1/2 carton cherry tomatoes
  • 1 bell pepper
  • 1/2 cup shredded carrots
  • 1 brick mild, semi-soft cheese (I used Formaggio with Salsa and Cilantro)

[Directions]

  1. Cook noodles according to the instructions on the box. Rinse with cool water then set aside in a large bowl.
  2. Whisk together chimichurri rojo and sour cream/greek yogurt in a small bowl.
  3. Rinse and cut vegetables into bite size pieces.  Add to bowl with noodles. Cut or grate cheese then add to bowl with veggies and noodles.
  4. Pour sauce over noodles/veggies then stir or toss to distribute sauce and vegetables.
  5. Serve chilled.

Cheers,

Danielle

Rhubarb BBQ Sauce

Summer means lots of fresh Michigan grown fruits and vegetables.  Strawberries are now in season and soon, I’ll be out picking as many pounds of blueberries I can!

Michigan asparagus and rhubarb are among my favorite veggies of this season. My mom makes an amazing strawberry rhubarb jam that is so delicious, you can eat it straight from the jar.

When I went to the farmers market and noticed a stand full of rhubarb, I couldn’t resist getting some.  Rather than cook this vegetable as a dessert, I decided to use the rhubarb to create a BBQ sauce.  I found the original recipe on Pinterest (http://www.eatwell101.com/homemade-bbq-sauce-rhubarb-recipe) but added in a few things.

It created a much lighter, subtly sweet sauce in contrast to a typical bbq sauce that tends to have a big taste profile and much thicker, sticky consistency. I would add more cayenne or even roasted red pepper flakes the next time I make it to give it just a little bit more heat.

{Rhubarb BBQ sauce}

[Ingredients]

  • About 2 cups chopped rhubarb
  • 3/4 of a large white onion
  • 15 oz tomato sauce (I used leftover homemade roasted red pepper tomato sauce)
  • 1 can tomato paste
  • 1/3 cup honey
  • 1/3 cup molasses
  • 2 TBSP Worcestershire sauce
  • 3 gloves garlic
  • 2 TBSP ketchup
  • 1/2 cup Apple Cider Vinegar
  • 2-3 tsp smoked paprika
  • 2 tsp cayenne pepper
  • 2 tsp chili powder
  • 1/2 tsp cumin
  • 1/4 tsp curry powder
  • 1/2 tsp salt
  • 1/2 tsp pepper

[Directions]

  1. In a food processor, pulse 1-inch sections of rhubarb until they are finely chopped, set aside.
  2. Pulse onion and garlic in the food processor until they are finely diced.
  3. Add all ingredients to a large sauce pan and bring to a boil.
  4. Reduce heat and simmer for 30-40 minutes.
  5. Add additional cayenne or red pepper flakes if you prefer a sauce with a bit more heat.
  6. If you prefer a sauce with a smoother consistency, cool sauce to room temperature and puree or use an emulsion blender once pan has been removed from stove top.

Cheers,

Danielle

Summer Teriyaki Marinade

The days are FINALLY getting warmer and longer! The sun rise is right around 6 AM and the mornings haven’t been too chilly.  The last few evenings I’ve enjoyed either running or relaxing on the deck.  I will never get tired of summer days, I was made to live somewhere that has weather like this consistently!

With sunny days and warm evenings, everyone in my neighborhood has been doing a lot of grilling. Its a double edged sword – I love the smell of a grill at work but when I arrive home famished, walking over to the neighbors with a plate sounds much better than cooking 🙂

Marinating your meat or veggies before throwing them on the grill takes whatever your making to a whole new level of delicious. We used this marinade with chicken and it gave a flavor. I marinated about 7-8 chicken breasts using the proportions in the recipe, adjust accordingly to how much meat/veggies you are preparing.

{Summer Teriyaki Marinade}

[Ingredients]

  • 6-8 boneless, skinless chicken breasts
  • 1 to 1 1/2 cups Teriyaki sauce
  • 1/2 cup + 2 TBSP Sweet Thai Chili Sauce
  • 1 TBSP Honey
  • 1/4 cup lime juice
  • 3 cloves garlic, diced
  • 1 teaspoon paprika
  • 1/2 teaspoon ginger

[Directions]

  1. In a large, resealable bowl whisk together ingredients expect chicken.
  2. Reserve about 3/4 cup of marinade to baste chicken with.
  3. Place thawed chicken in marinade, cover and refrigerate for up to 12 hours.
  4. Cook on grill basting with reserved marinade when chicken is turned.

Cheers,

Danielle

Red Velvet Smoothie

While this isn’t a traditional take on a Red Velvet smoothie, the color and consistency is what gave it the name.  I would also like to note, this isn’t one of my lower calorie smoothies. But it is delicious and full of good-for-you fats.

I used my homemade coconut Kefir in this recipe and Dan was pleasantly surprised that he liked it.

I opted to use avocado to create a rich and creamy consistency rather than a frozen banana like I usually do.

This is a great recipe for a delicious dessert that is still good for you.  Try pouring it into Popsicle molds, freezing for the kids to enjoy on a warm summer night.

This recipe will give you about a 24-ounce smoothie.

{Red Velvet Smoothie}

[Ingredients]

  • 1/2 cup Unsweetened Vanilla Almond milk
  • 1/2 cup Coconut milk Kefir
  • 7-10 strawberries
  • 1/2 avocado
  • 2 heaping TBSP Nutella
  • 1/4 cup old fashioned oats
  • 1 1/2 cups ice
  • 1/2 packet Carnation Instant Breakfast, Sugar free, Chocolate flavor

[Directions]

  1. Add almond milk, kefir, ice, and oats to your blending system then blend until smooth.
  2. Add remaining ingredients then blend for about one minute. Remove from motor and scrap down the sides of the blender.
  3. Again, blend for about one minute then scrap down sides. Blend for a final time for about 2 minutes until your smoothie has a smooth, velvety consistency.

Cheers,

Danielle